
NGINX vs Apache, while they both have their pros and cons, one stands out clearly for self hosting - NGINX. There are a few key reasons for this including the following:
- Lightweight - When self hosting, you have limited resources. NGINX uses fewer resources.
- Reverse Proxy - Many of your services are going to run on weird ports without encryption. NGINX allows you to access them from convenient URLs using HTTPS encryption.
- Easy Configuration - You don't need to be an expert to understand NGINX config files.
- It just works.
This guide will go over installing NGINX, basic configuration, enabling PHP, setting up server blocks, getting and using free SSL, setting up reverse proxy, and using the alias function.
Installation
Installation is easy, just use your distributions package manager to install the NGINX package:
Ubuntu/Debian:
apt-get install nginx
You can find instructions for other distributions here.
Once installed, just head over to your server IP or domain in a web browser and you should see the following page:

If so then you're good to start configuring!
Basic Configuration
The default config file or 'server block' is located at /etc/nginx/sites-available/default. If you stripped out all the comments, then it would look like this:
server {
listen 80 default_server;
listen [::]:80 default_server;

root /var/www/html;
index index.html index.htm index.nginx-debian.html;

server_name _;

location / {
try_files $uri $uri/ =404;
}
}
At first it may seem as though there is a lot going on. Here's a rundown of everything:
- The
listenlines tell the server what port to run on. 80 is the standard for HTTP, 443 for HTTPS. Thedefault_serverstring means all requests will go here is there is no other block for them. It can only be in 1 server block. Roottells the server where on the server the files you want to serve are.indextells the server what file should be served when you just go to the IP or URL.server nametells the server what domain to listen for._is any.- The
locationblock just says that if the request can't be served, return a 404.
Before we begin making changes, we want to make a backup of the default block. This is so if something gets really messed up, we can restore it easily. We'll also install PHP now so we can enable it in the config.
cp /etc/nginx/sites-available/default /etc/nginx/sites-available/default.old
Enabling PHP
PHP is an extremely common server side scripting language. Unlike Apache, NGINX does not integrate PHP natively. Instead, whenever it needs to serve some PHP, it makes a call to an external PHP server process. While this tends to make the configuration slightly more complex, it cuts down on overhead and improves performance.
First you need to install the php-fpm package:
apt-get install php-fpm
Now one quick security improvement we can make is edit the php.ini file. It is usually located at /etc/php/7.0/fpm/php.ini. You want to find the commented out line called cgi.fix_pathinfo, make sure it is uncommented and set to 0. Great! Now we can tell NGINX to use PHP-FPM to process PHP files.
Open up the default server block in your text editor of choice and add this location block to the bottom of the server { } block. While your at it, update the index command by adding index.php.
location ~ .php$ {
include snippets/fastcgi-php.conf;
fastcgi_pass unix:/run/php/php7.0-fpm.sock;
}
Now make a new file called info.php in your web root and add <? phpinfo(); ?> to it. Now if you head over to http://yourdomain/info.php, you should see somthing similar to the following:
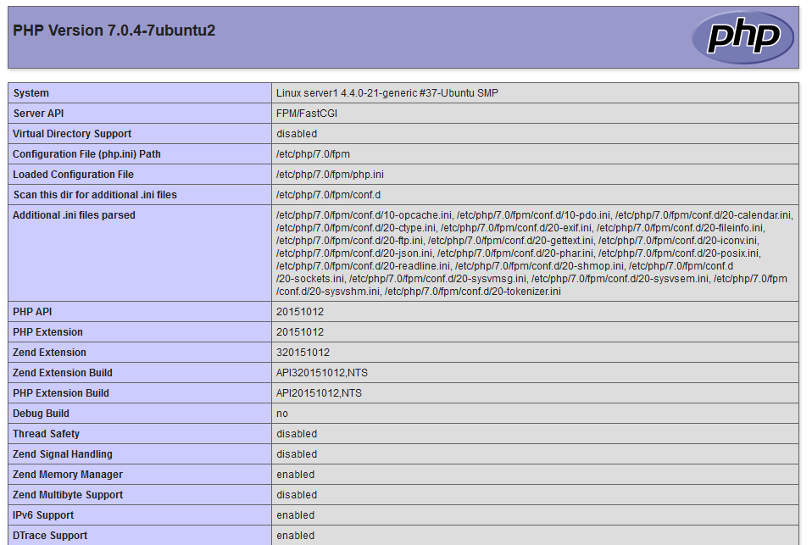
Cool, Now your all set with PHP!
Server Blocks (Virtual Hosts)
You'll likely want to run multiple domains or subdomains serving different services through the same server. If you need your own domain, I can personally recommend NameCheap. With NGINX, this is easy. First, we need to copy the default server block for our new domain. Name the copy whatever your domain is to keep things organized, make a new web root, and then open the new config to edit:
cd /etc/nginx/sites-available
cp /etc/nginx/sites-available/default /etc/nginx/sites-available/my.domain.com
mkdir -R /var/www/mydomain/html
Now for what to change.
- Remove
default_serverfrom the first 2listenlines. - Change the
rootto the new directory you made. - Replace the
_byserver_nameto your domain. For example,my.domain.com.
That's it; now to enable the server block we need to link it to the enabled directory, test it and then reload the web server:
ln -s my.domain.com ../sites-enabled/my.domain.com
nginx -t
service nginx reload
Now head over to the domain you should get a 404. If you do that great, that means that instead of going through the default config and showing the NGINX welcome, it looking in the web root you set and found nothing. Now you can add whatever content you want to the new folder you made; just make sure it's owner and group is the user that is running web server process (eg. www-data).
You can repeat this process for however many domains you want to use. Just remember to remove default_server and change the root to something new.
Let's Encrypt SSL Certificates
SSL encryption is an important part of any public web services. They encrypt all data sent to and from the server to prevent man-in-the-middle attacks. And, now that you can get free, signed SSL certs through Lets Encrypt, there's no reason not to.
Setting Up
First, we need to get the letsencrypt and openssl package. On Ubuntu, sudo apt-get install letsencrypt openssl does the job. Then we need to make a small change to all server blocks we want to secure. Add the following line to each server block:
location ~ /.well-known {
allow all;
}
Then just reload with service nginx reload. Now generate a strong DH group with the following command: sudo openssl dhparam -out /etc/ssl/certs/dhparam.pem 2048. This might take a few minutes so sit tight. Great, now were set to make get some certs.
Getting Certificates
To get your certificates, your going to run the next command but you'll have to change a few things. Set --webroot-path= to whatever your root is, set -d to your domain.
sudo letsencrypt certonly --webroot --webroot-path=/var/www/html -d example.com
If successful, it should print out where your certificates were placed. Niw we can go install the certs.
Installing Certificates
Now we need to make a few snippets to add to our server block. Change all example.com your domain.
#/etc/nginx/snippets/ssl-example.com.conf

ssl_certificate /etc/letsencrypt/live/example.com/fullchain.pem;
ssl_certificate_key /etc/letsencrypt/live/example.com/privkey.pem;
#/etc/nginx/snippets/ssl-params.com.conf

ssl_protocols TLSv1 TLSv1.1 TLSv1.2;
ssl_prefer_server_ciphers on;
ssl_ciphers "EECDH+AESGCM:EDH+AESGCM:AES256+EECDH:AES256+EDH";
ssl_ecdh_curve secp384r1;
ssl_session_cache shared:SSL:10m;
ssl_session_tickets off;
ssl_stapling on;
ssl_stapling_verify on;
resolver 8.8.8.8 8.8.4.4 valid=300s;
resolver_timeout 5s;
add_header X-Frame-Options DENY;
add_header X-Content-Type-Options nosniff;

ssl_dhparam /etc/ssl/certs/dhparam.pem;
Great now that we've got the snippets, we can apply them to the server block. Make your server block look like the following with your own info and snippets:
server {
listen 80;
listen [::]:80;
server_name example.com;
return 301 https://$server_name$request_uri;
}

server {
# SSL configuration

listen 443 ssl http2;
listen [::]:443 ssl http2;
include snippets/ssl-example.com.conf;
include snippets/ssl-params.conf;

root /var/www/example/html;

index index.html index.php index.htm index.nginx-debian.html;

server_name example.com;

location / {
try_files $uri $uri/ /index.php?$args;
}

location ~ \.php$ {
include snippets/fastcgi-php.conf;
fastcgi_pass unix:/run/php/php7.0-fpm.sock;
}

location ~ /\.ht {
deny all;
}

location ~ /.well-known {
allow all;
}

}
Now reload NGINX. Now if you head over to your domain it shout redirect to the HTTPS version and you should see a green lock! Perfect!
Reverse Proxy
When self hosting, its very common to end up with lots of services running on a number of ports. You can make it much easier to access and share all the these services using a reverse proxy. As an example I'll proxy Sonarr, a popular self hosted media app from the default of ip:8989 to example.com/sonarr. Since I already have a server block setup with SSL for example.com, this will be super simple.
It's just a matter of opening up the server block and adding a location block. Then change the directory of the location block to whatever you want it to be. Lastly replace the IP and port to that of your Sonarr install.
location /sonarr {
proxy_pass http://192.168.1.12:8989;
proxy_set_header Host $host; #DO NOT CHANGE
proxy_set_header X-Real-IP $remote_addr; #DO NOT CHANGE
proxy_set_header X-Forwarded-For $proxy_add_x_forwarded_for; #DO NOT CHANGE
}
Then you just need to go to Sonarrs settings and set the base url as sonarr and reload bot Sonarr and NGINX. Now if you head over to example.com/sonarr you'll see your sonarr, just without that pesky port.
Alias
If you want to run an app like WordPress, at a URI like example.com/blog but you want all files related to it to be in a different directory, you'd use the alias function. One quirk is you need to add your PHP for PHP to work. Check this out:
location /alternative {
alias /var/www/alternative_html/;
location ~ /\.php$ {
fastcgi_pass unix:/run/php/php7.0-fpm.sock;
include fastcgi_params;
fastcgi_param SCRIPT_FILENAME $request_filename;
}
}
You can change alternative and alternative_html to whatever you like then you should be all set.
Now that you've got a secure, robust and lightweight web server, you can install Koel - a self hosted music server. Or not. It's really up to you :)
Last Updated: 07/11/17