
If you only have access to a public Wi-Fi network while working with your Raspberry Pi, or the only Wi-Fi network available to you is 5 GHz, you may want to share the internet connection from your Windows laptop or computer with your Pi over ethernet. You can use Window's Internet Connection Sharing (ICS) feature to help you do this. Below are the steps required to set it up so it reliably works across reboots.
Steps
- Open Windows Control Panel and navigate to
Control Panel> Network and Internet > Network and Sharing Center. ClickChange Adapter Settingsin the left-hand panel and you should be presented with a list of network adapters:
- Identify the Wi-Fi adapter with the active internet connection that you would like to share, and the Ethernet adapter you would like to share the connection to. In my case, the Wi-Fi adapter is called
Wi-Fiand the ethernet adapter is calledEthernet. - Right-click on the Wi-Fi adapter, and select
Properties, then select theSharingtab in the top of the window.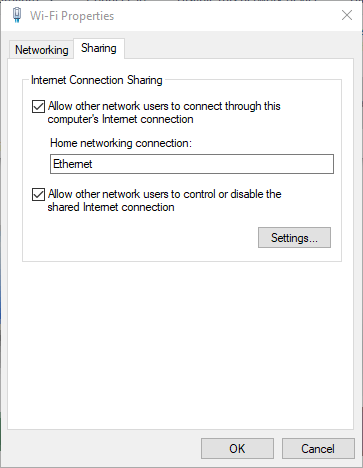
- Tick the "Allow other users to connect through..." box and then select the ethernet adapter identified in step 2 from the drop-down menu below. Click ok.
You should now seeSharedbeside the name of the Wi-Fi network you are connected to on the Wi-Fi adapter item. - To make the ICS service startup automatically with Windows, search for
Servicesin the start menu and open the Windows services utility.
- Find the service called
Internet Connection Services (ICS), right-click it and selectProperties. SelectAutomaticfrom the Startup type drop-down menu. Then click OK and exit the services utility.
- To make the ICS service actually work after a reboot we need to create a registry key. Search for and open the
Registry Editorin the start menu. PasteComputer\HKEY_LOCAL_MACHINE\SOFTWARE\Microsoft\Windows\CurrentVersion\SharedAccessinto the adress bar at the top of the window. Right-click anywhere and selectNew > DWORD (32-bit) Value. Name the new keyEnableRebootPersistConnection. Double click the new key and change the Value data field to1.
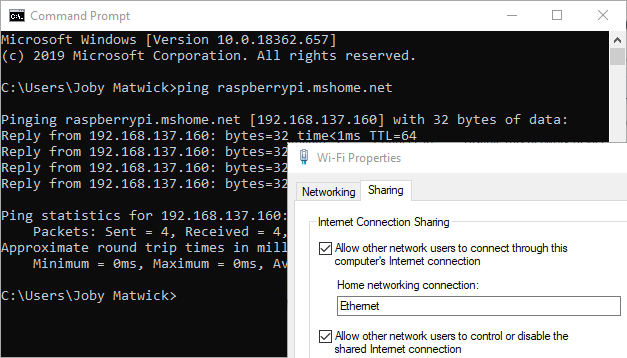
At this point you should be all set. Plug your Raspberry Pi into the ethernet port of your computer, and power it up. You should see the ethernet activity lights on the Pi blinking away as Windows assigns it a new IP from the 192.168.137.* sub-net. Because Windows will assign your Pi an IP, you wont know what IP to use to ssh into it. You can test the connection as well as resolve the IP by opening a command prompt window in typing ping raspberrypi.mshome.net where rasperrypi is the hostname of the Pi (raspberrypi is the default).
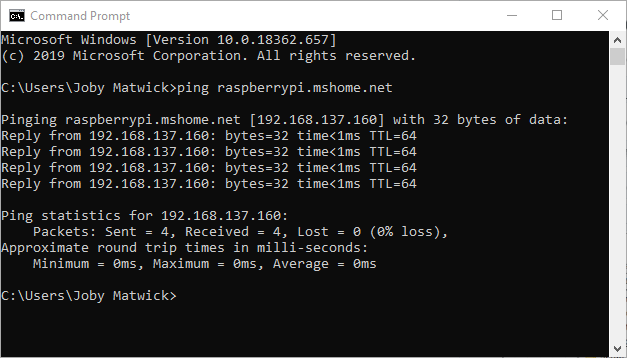
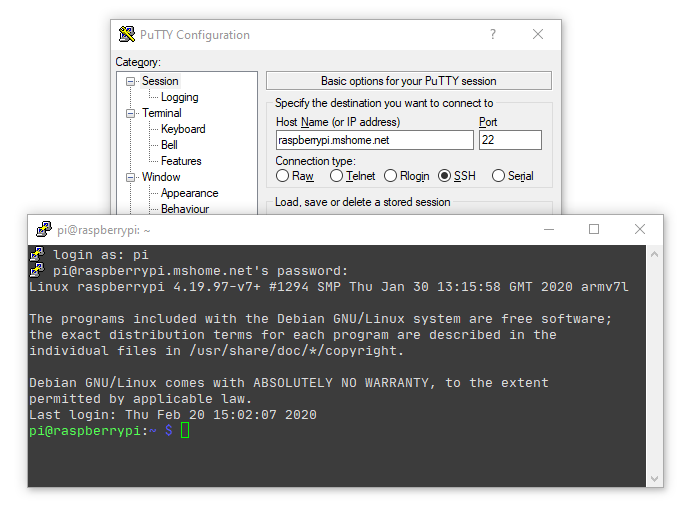
If all is well, you will see a response from the resolved IP of the Pi. To ssh into the Pi, you can either enter raspberrypi.mshome.net or the resolved IP into PuTTY, but be aware that the IP will likely change every time you connect the Pi.
Troubleshooting
- If you can ping the Pi but can't connect via ssh, ensure that ssh is enabled. See the Raspberry Pi documentation for details on this.
- If you can connect to the Pi but it cant reach the outside internet, make sure your computer is connected to the internet via Wi-Fi.
- If the ICS stops working after a reboot, and you are sure steps 5-7 were done properly, you may be forced to disable and re-enable ICS in the Wi-Fi adapter settings after every reboot. This is a known issue with Windows some people have encountered.